筆記使用新版的 next.js 13 建立簡易的 blog 流程
- 安裝新版的 next.js
- 建立 global 頁面及 global css
- 使用 useRouter 取得現在路徑,動態更改 className
- 使用 getStaticProps 取得欲顯示的靜態資料
- 建立動態的靜態單獨頁及單獨頁頁式
- 使用 getStaticProps 的 revalidate 定時更新靜態頁面資料
- getServerSideProps 建立無緩存,由 server side建立的資料
安裝新版的 next.js
npx create-next-app@latest
# or
yarn create next-app
# or
pnpm create next-app
建立 global 頁面及樣式
新增 pages資料夾,資料夾對應的檔名即為頁面路徑
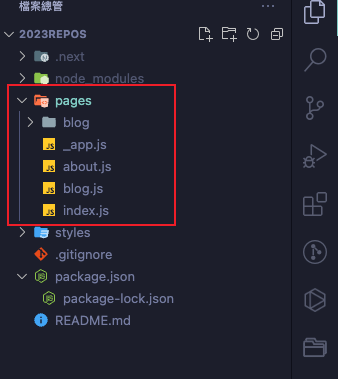
gloabl的全局頁面檔名需命名為 _app.js
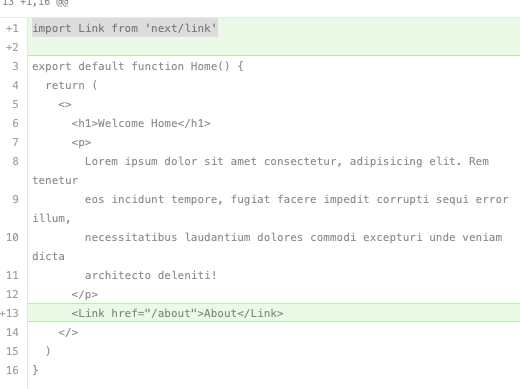
return 的 Component 組件會載入各頁面內容

import Link組件可跳轉到指定頁面,頁面會解析成 <a> tag
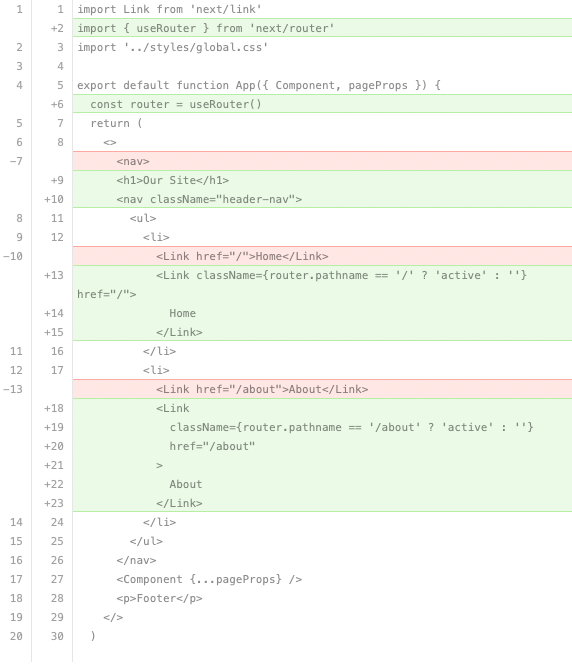
使用 useRouter 取得現在路徑,動態更改 className
使用 next/router 提供的 useRouter 可以取得目前的 router 名稱
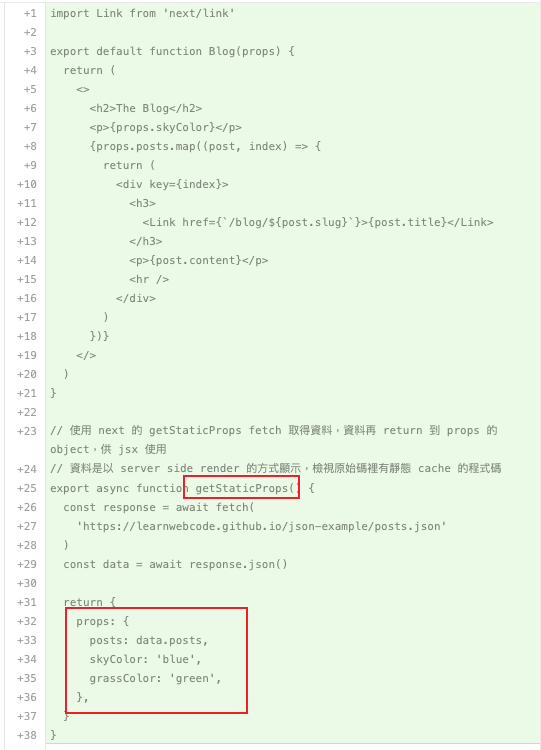
使用 getStaticProps 取得欲顯示的靜態資料
建立動態的靜態單獨頁及單獨頁頁式
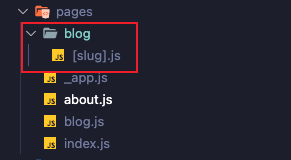
新增 blog 資料夾,再建立一個 [slug].js (此例是 blog 下有各別單獨的 blog 內容頁)
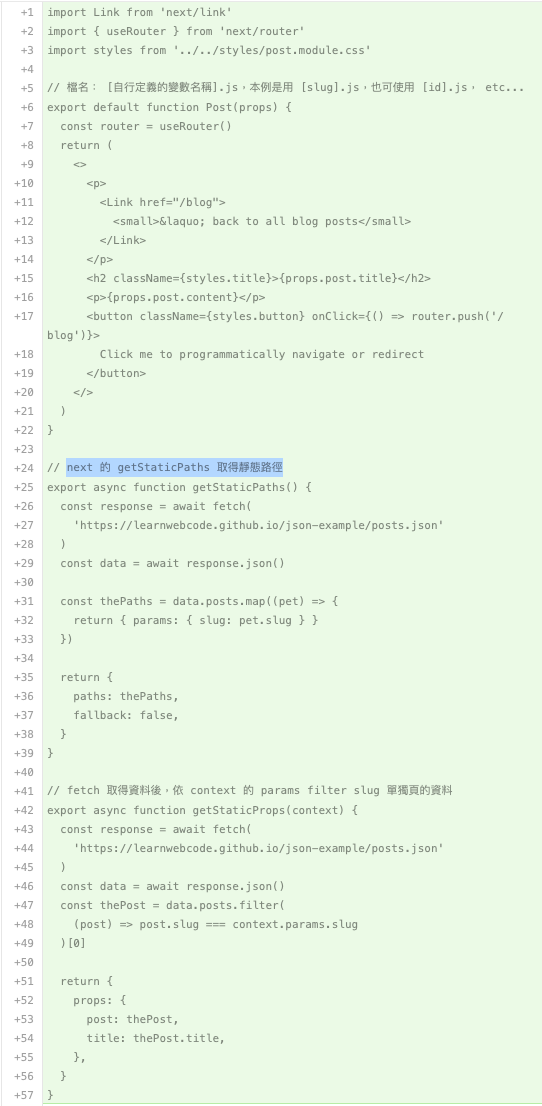
檔名: [自行定義的變數名稱].js,本例是用 [slug].js,也可使用 [id].js …等等
使用 next.js 提供的 getStaticPaths 方法取得靜態路徑,再取 context.params filter 應顯示的 blog 單獨頁內容
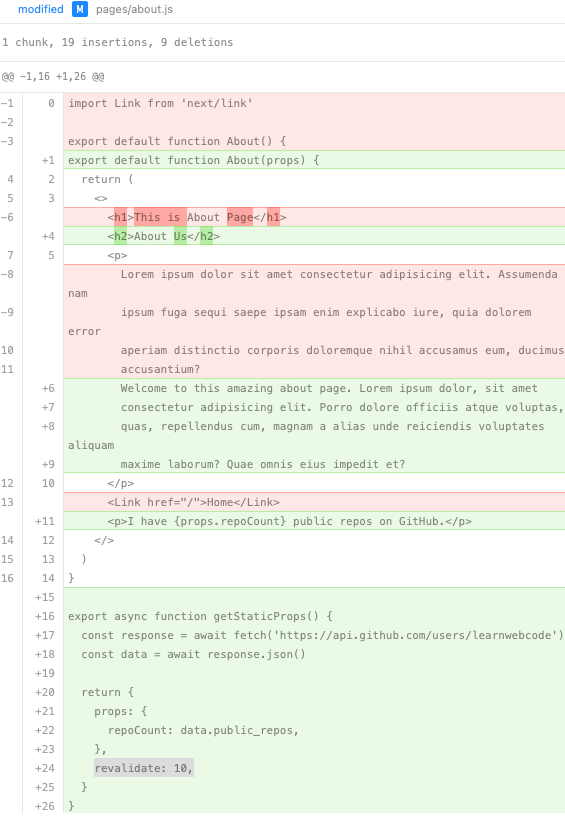
使用 getStaticProps 的 revalidate 定時更新靜態頁面資料
getStaticProps 的 revalidate: 10, 會在頁面 reload 後重再去拿取是否有新的資料
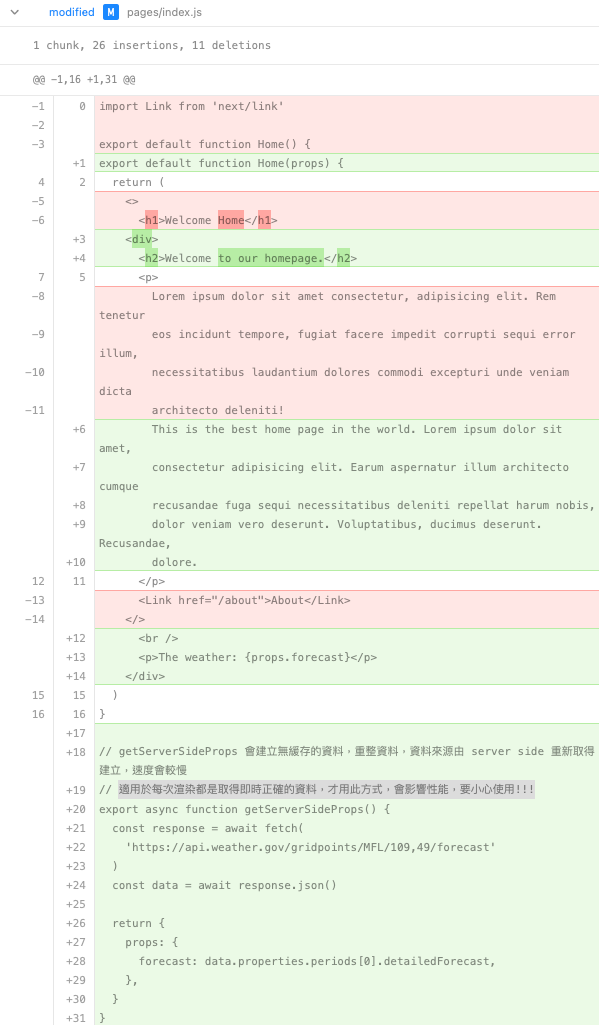
getServerSideProps 建立無緩存,由 server side建立的資料
getServerSideProps 會建立無緩存的資料,重整資料,資料來源由 server side 重新取得建立,速度會較慢
適用於每次渲染都是取得即時正確的資料,才用此方式,會影響性能,要小心使用!!!